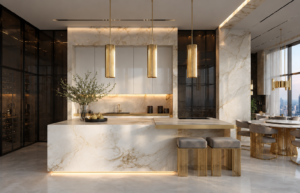
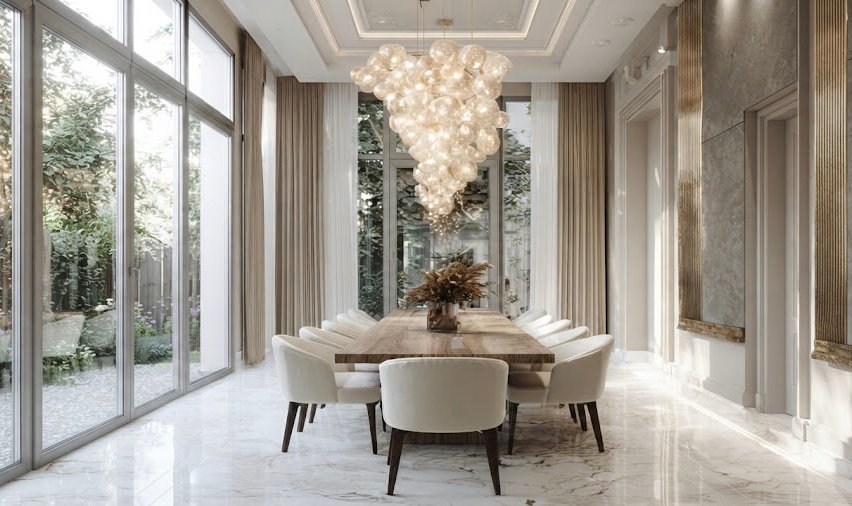
Every piece of joinery in a finished home, from a kitchen island to a floor-to-ceiling wardrobe, starts long before any wood is cut. There’s a tendency to think of custom furniture as a single event: you choose a design, and some weeks later it appears, fully built. In reality it’s a sequence of distinct stages, each of which shapes the outcome in ways that aren’t always visible in the finished piece. Here’s what actually happens between a first conversation and the day your furniture is installed.
Step 1: Understanding the Space and the People In It
Before any drawing begins, we spend time understanding how a room is actually used, not just how the client imagines describing it. A kitchen for a family that cooks daily needs a fundamentally different layout than one built mainly for entertaining a few times a year. A wardrobe for someone with an extensive shoe collection needs different proportions and shelving than one built around folded knitwear and hanging garments.
This stage also involves a site visit and precise measurement of the actual space, not just working from architectural plans, which can differ from as-built dimensions by a surprising margin, especially in older properties. We check for anything that might affect the design: uneven walls, existing plumbing or electrical points, ceiling height variations, natural light at different times of day. This stage is less about style and more about function, because the best-looking joinery in the world is a disappointment if it doesn’t work the way you actually need it to on a Tuesday morning when you’re running late.
Step 2: Concept Design and CAD Drawings
Once we understand the brief, our design team develops detailed CAD drawings, mapping out exact dimensions, material choices, and hardware specifications. This is where structural decisions get made: where a drawer needs reinforcement to handle heavier items, how a door swing interacts with the rest of the room’s traffic flow, where plumbing or electrical points constrain or inform the layout, and how weight distribution affects panel thickness and support structure.
CAD drawings also allow us to test different configurations quickly before committing to one, adjusting a wardrobe’s internal layout, testing whether a kitchen island fits comfortably with enough clearance on all sides, or checking how a run of wall paneling will align with existing architectural features like skirting boards or window frames. This stage typically involves at least one or two rounds of revision as the client’s preferences get refined against what’s structurally and spatially realistic.
Step 3: 3D Visualization
Because it’s genuinely difficult to picture a finished piece from technical drawings and material swatches alone, we build 3D visualizations so clients can see color, finish, proportion, and how natural and artificial light will interact with the piece before committing to production. Seeing a rendered wardrobe in the context of the actual room, rather than as an isolated drawing, changes how people evaluate scale and proportion.
This step often surfaces small adjustments early, a handle style that doesn’t suit the room’s overall proportions, a panel that feels visually heavier than expected for the space, a finish that looks different under the room’s actual lighting than it did as a small sample. Catching these issues at the visualization stage, while they’re still simple and inexpensive to change, is far preferable to discovering them after a piece has already been manufactured.
Step 4: Material Selection and Sourcing
With the design confirmed, we move to material selection and sourcing. This includes drawing on relationships with suppliers for veneers, laminates, stone, hardware, and finishes suited specifically to Dubai’s climate, chosen for durability as much as appearance. A material that performs beautifully in a temperate European climate may not hold up the same way here, so every material decision is made with the specific piece, its location in the home, and Dubai’s conditions in mind, not selected from a generic catalogue without that context.
This stage can also involve producing physical samples for the client to see and touch in the actual space where the piece will be installed, since lighting and surrounding finishes can change how a material reads compared to how it appeared in a showroom or online.
Step 5: In-House Manufacturing
Because design and manufacturing sit under one roof, our workshop team builds directly from the approved drawings, with the original designer available throughout production to resolve any questions that come up on the shop floor, rather than requiring a formal change request process between separate companies. This stage is also where craftsmanship becomes visible in the details that a client may never consciously notice but would certainly notice the absence of: precise joints that don’t shift over time, soft-close mechanisms calibrated to the exact weight of each door and drawer, and finishes applied by hand in the areas where a machine finish wouldn’t achieve the same result.
Quality checks happen at multiple points during manufacturing, not just once at the end, catching issues like a slightly uneven veneer join or a hinge that isn’t seated quite correctly while they’re still simple to correct on the workshop floor rather than after installation.
Step 6: Installation and Final Walkthrough
The final stage is installation on-site, carried out by a team who, in many cases, has visited the space before and understands its specific quirks. Installation is followed by a detailed walkthrough to confirm every drawer glides smoothly, every door aligns correctly, every soft-close mechanism functions as intended, and the finished piece matches what was designed and approved.
Because our own team handles this step rather than handing it to a separate installation crew, any final adjustments, a hinge that needs a small tweak, a panel that needs re-levelling against a wall that turned out to be slightly uneven, happen immediately, using the same team’s tools and knowledge of the piece, rather than being scheduled around a third party’s availability days or weeks later.
What Happens After Installation
The process doesn’t formally end on installation day. Because the same team designed, built, and installed the piece, any questions or adjustments that come up in the following weeks or months, as a client settles into using the new space daily, get resolved by people who already understand exactly how and why the piece was built the way it was. This continuity is something that’s easy to overlook when comparing joinery companies, but it tends to matter a great deal in the months after a project is technically complete.
Why the Process Matters as Much as the Result
A well-designed process is what makes a finished piece of joinery feel inevitable, as if it was always meant to be there, rather than something bolted onto a space as an afterthought. After more than three decades of refining this process across Dubai homes and businesses, we’ve found that the projects clients are happiest with years later are almost always the ones where every one of these steps, understanding the space, CAD drawings, 3D visualization, careful material sourcing, in-house manufacturing, and precise installation, was given the time and attention it actually needed, rather than being compressed to meet an aggressive timeline.
If you’re planning a project and want to see how this process would work for your specific space, we’d be glad to walk you through it, starting with an honest conversation about how you actually use the room in question.